I promised myself I would try new things, and this is the first update on that resolution.
I'm holding off on recounting my experience with Krylon Glitter Blast (my first can had a busted nozzle, and I'm waiting to get my replacement can so I can give a more accurate review of the product). I did also try an alternate technique for glittering recently.
Glittering shoe tutorials mostly fall into two camps:
(1) Apply glue/mod podge over the shoe then cover with glitter (for example: this tutorial, this tutorial or this tutorial); usually followed up with a coating of something clear to seal the glitter to the shoe.
OR
(2) Mix together glitter and glue/mod podge, then paint the shoe with several coats of your homemade glitter glue (for example: this tutorial, this tutorial or this tutorial)
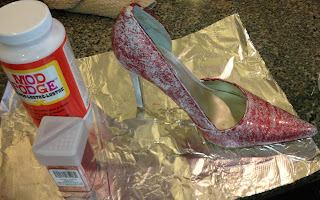
I like to use technique #1, without sealing after glittering, because the shoes won't be worn and it tends to diminish the sparkle pretty substantially. I was using the homemade glitter glue process for another craft project, and while I had a cup of red glitter and glue mixed up, I thought I'd try it on a shoe:
 |
| I used Recollections glitter (color "cherry") (mixed glitter and glue in the cup). This is the shoe after one coating, the glue's still wet (it dries clear). |
 |
| After one coat of glitter+glue, glue dried. |
 |
| After two coats of glitter + glue, looking a little more filled in. |
 |
| Finished shoe (about 4 coats total) |
 |
| Other side of the finished shoe |
The advantage of this method is that it is definitely much tidier than coating with glue and pouring glitter over it, both during decorating and after the project is complete. So if you don't have a dedicated glittering work space and you're fearful of spreading glitter, this is the way to go. It looks a little duller in the pictures than it actually is, there's definitely some glitz. I would say you might want to really overdo the other embellishment if using this method as a base. The main drawback is that it's glittery (more glittery than the pictures show), but it isn't nearly as glittery as the other method. It's also slightly more time consuming (it takes more coats, and that means more drying time) and I'm not wild about the texture. Of course, you might be able to optimize this process by tinkering with the ratio of glue to glitter, which I didn't experiment with.
Personally, I won't be using this technique for Muses shoes because I think it's worth it to max out the sparkle and I've nailed down a method for containing/cleaning glitter that I can live with. I'm going to stick with coat with glue, cover with glitter, shake off the excess. But the scientist in me is, as always, glad I tried something new. Next up in the new things queue: Krylon Glitter Blast (I'm told the replacement can is in the mail).
No comments:
Post a Comment