Monday, August 29, 2016

Work in Progress - Popeyes Fried Chicken Shoe

Love that chicken from Popeyes!!

Last year a friend pointed out that there hadn't ever been a Popeyes Fried Chicken shoe and I had to agree that was a shame - what Carnival season is complete without a box? It was too close to the parade last year for me to do anything with it for 2016, but I threw it in my big, groaning folder of ideas to revisit. I recently got the awesome news that I'd be riding as a sub again in 2017 (WOOHOO!) and we're approx. halfway to Carnival 2017, so no time like the present to get cracking.

As luck would have it, my little one caught this sweet light up plastic bone from Krewe D'Etat in 2016. He enjoyed it tremendously until the light wore out, then graciously let mama have it. That's what I've used for the bone:


If you don't have a d'Etat bone in your Carnival haul, I don't think it would be too hard to paper mache one (Google "paper mache bone," there are a ton of tutorials online). If you'd rather use a plastic one, you could keep an eye out once Halloween costumes hit the shelves - I sometimes see them being sold as props for cavemen costume (like this one here). Or if you're already placing an order with an online costume supplier for Halloween or something else (i.e. if you're already paying for shipping), maybe check and see if they have one.

After I hot glued the bone on the heel, I took some scrunched up tissue paper and lightly hot glued that all over the shoe to give it that crinkly chicken skin effect. A coat of mod podge over the whole surface helped sort of decoupage this tissue it onto the shoe wherever the hot glue wasn't holding it down.

Shoe post-tissue, pre-glittering

I mixed up a blend of glitter similar to what I used for the Fried Shrimp Poboy Flip Flop: mostly chunky copper glitter and fine copper glitter, with a little very fine dark red glitter, fine gold glitter, chunky red glitter and just a teeny bit of fine black glitter. If you use any chunky glitter or chunky glitter blends, remember to really aggressively brush off loose glitter after each layer dries because it doesn't adhere as well to the glue and shedding is the enemy.


Here are some pictures of the glittered shoe up close so you can see the effect of blending multiple glitters and layering the blend over scrunched up tissue paper:


I usually do two coats of glitter, but in this case I may either do a third coat or a lot of touch ups because the surface is so craggy, but I'm really happy with the effect. Here it is so far:


Next up: a Popeyes logo and "Muses 2017." Happy glittering everyone!!

Thursday, August 18, 2016

Glittering 101 Workshop - Saturday September 24, 2016


Date set for the September Glittering 101 Workshop! I CAN'T WAIT!!

The workshop will be 2.5 hrs long (2-4:30 pm) on Saturday Sept. 12th. We're going to cover the basics of glittering shoes, including covering shoes with glitter, using the transfer technique for "glettering" (glittered lettering) and various types of embellishment. We'll cover the whole process start to finish, but I'll provide shoes at staggered stages of completeness so we don't have to wait for glue to dry between steps. At the end of the workshop, you'll leave with some partially completed shoes, at least one completely finished ready-to-throw shoe, and some extra materials for finishing up your partial shoes at your leisure. The workshop fee also includes a 23 page packet of useful write-ups (including a detailed step-by-step guide to glittering shoes with photos at each step, all the tips and tricks I've picked up in 5 years of shoe glittering, a guide of useful resources, etc.). Everything you need will be provided - you only need to sign up, pay up and show up!!

I originally assumed it would only be useful for beginners, but we've had a range of experience levels attend and enjoy themselves (from total newbies to experts). My primary area of expertise is of course glittering shoes, but I can provide customized workshop materials for ladies who ride in other krewes. Just let me know who you roll with/what your preferred throw is when you email me. If you're not a krewe member but would like to beef up your glittering skills, you are also welcome to join us!

Feedback and pictures from past workshops to give you a little taste of what's in store can be found HERE and HERE.

If you're interested or have any questions, drop me an email at drnoripants at gmail dot com and I can give you more info (including pricing)!

Saturday, July 9, 2016

A little more Muses shoe inspiration

The weekend has arrived, and I'm hoping that means a little time to set up my new glitterage here and get to creating! Before my little one wakes up and seizes the day with both hands toddler-style, I thought I'd update here right quick.

So, I don't actually like the Monster High dolls themselves (as this Dad put it: "it's like someone at Mattel held up a market research study and screamed 'our Barbie dolls aren't causing as much body dysmorphia in children as they used to!' and then made Monster High dolls to "fix" that problem). Anyways, while the execution is a little problematic, I do love the concept (a glamorous high-fashion take on Goth/classic Horror tropes), and this Buzzfeed list turned me onto how unbelievably fabulous and creative the shoe design for the dolls is. I've started a Pinterest board of Monster High (and Ever after High) Shoes HERE, so if you're ever looking for wild shoe designs to get your creative juices flowing, have a peak (if you missed it, I shared some designers/artists whose work is great inspiration in this post).

Have a great weekend!!

Thursday, July 7, 2016

Moved to NOLA!

We are finally at long last moved to NOLA and I am very very excited, though also very very tired of unpacking boxes.

I am desperate to get back to glittering. Alas setting up my new workspace is somewhat low priority at the moment, but I have a ton of ideas swirling around in my brain and I can't wait to get them into actual 3D shoe form!! I have high hopes for a smidge of sparkle time this weekend. And of course I need to start planning more workshops in the fall when it cools off a bit.

Until I get back up and running, here are a few shots of shoes I was working on before the move that are in varying stages of completeness. If you follow me on Instagram, you've already seen these, but I know different people prefer different platforms (I met one fellow glitter addict at a workshop who only follows me on Pinterest and she must think I was hit by a bus or something...)

First up - my first "official" 2017 shoe - Rhinestone Cowgirl! A friend of a friend gifted me a bunch of awesome Cowgirl boots to glitterify, and I've been loving working with a slightly different shoe shape. I did a vintage Mardi Grad color scheme on this first one. The boot had elaborate stitching that I didn't want to lose, so first step I covered the boot with translucent white sheer glitter (Gary's glitter by the pound, HOLLA). Then I did the other areas of the boots (heel, trim, sole, toe, etc.) in solid opaque glitter (all Martha Stewart, but I'd have to double check the exact colors). Then I traced the stitched in design with crystal puff paint and added a gradient of gold to green to purple. The gradient is essentially five colors of glitter: gold, then 50-50 gold and green, then green, then 50-50 green and purple and finally purple. I just shook stripes over the wet puff paint and voila - Carnival fabulousness!! I added some white feathers with gold tinsel up top, and some aurora borealis rhinestones which were added post-pictures.


Y'all know I love a shoe with a Snoball heel (after all, I've made four so far). After drooling over images of the bananas foster topping available as a special Wednesday-only at Hansen's I just had to exorcise my food-lust demons with another shoe. Here she is so far:


Ooooh sexy Instagram filter on this shot

The bananas are baked and painted polymer clay and the snoball itself is a foam ball glittered with Martha Stewart "lemondrop." The gooey caramel loveliness is represented by tons of drippy gold glitter paint (Tulips 3D Scribbles, my go-to for glettering transfers). The cup is a plastic Mardi Gras cup covered first with a layer of opaque teal (I want to say Gary's glitter by the pound), then followed up with a layer of iridescent sheer (Martha Stewart "blueberry slush"). Sidebar: I picked up a bunch of sale Martha Stewart glitter at Michael's a while back and now it seems it's been discontinued there...anyone know what's up? Are they no-longer carrying it, or revamping the line or what? I love the effect of layering iridescent over opaque like this - such a rich depth of color! The interior is the same effect: opaque magenta with iridescent sheer hot pink over it, this time Recollections. Gold trim from Joann's around the edges and criss-crossed "straps" made from faux little white spoons (actually craft foam stiffened with plastic sheets, then glittered with sheer white glitter from Gary's). I will have to blog about using plastic in combination with craft foam another time, but it has been a game changer for me in terms of allowing my to just build whatever I want from scratch.

As usual, there are things I'd do differently on it if I had a time machine, but overall I love how this shoe is turning out. The cup needs a lot of embellishment since I love that color blue but it's pretty plain at the moment - I'm leaning towards a riff on the 75th Anniversary cup design, but replacing the numbers with 17th or 18th because it'll be thrown in 2017 or 2018, Muses 17th or 18th year of rolling.

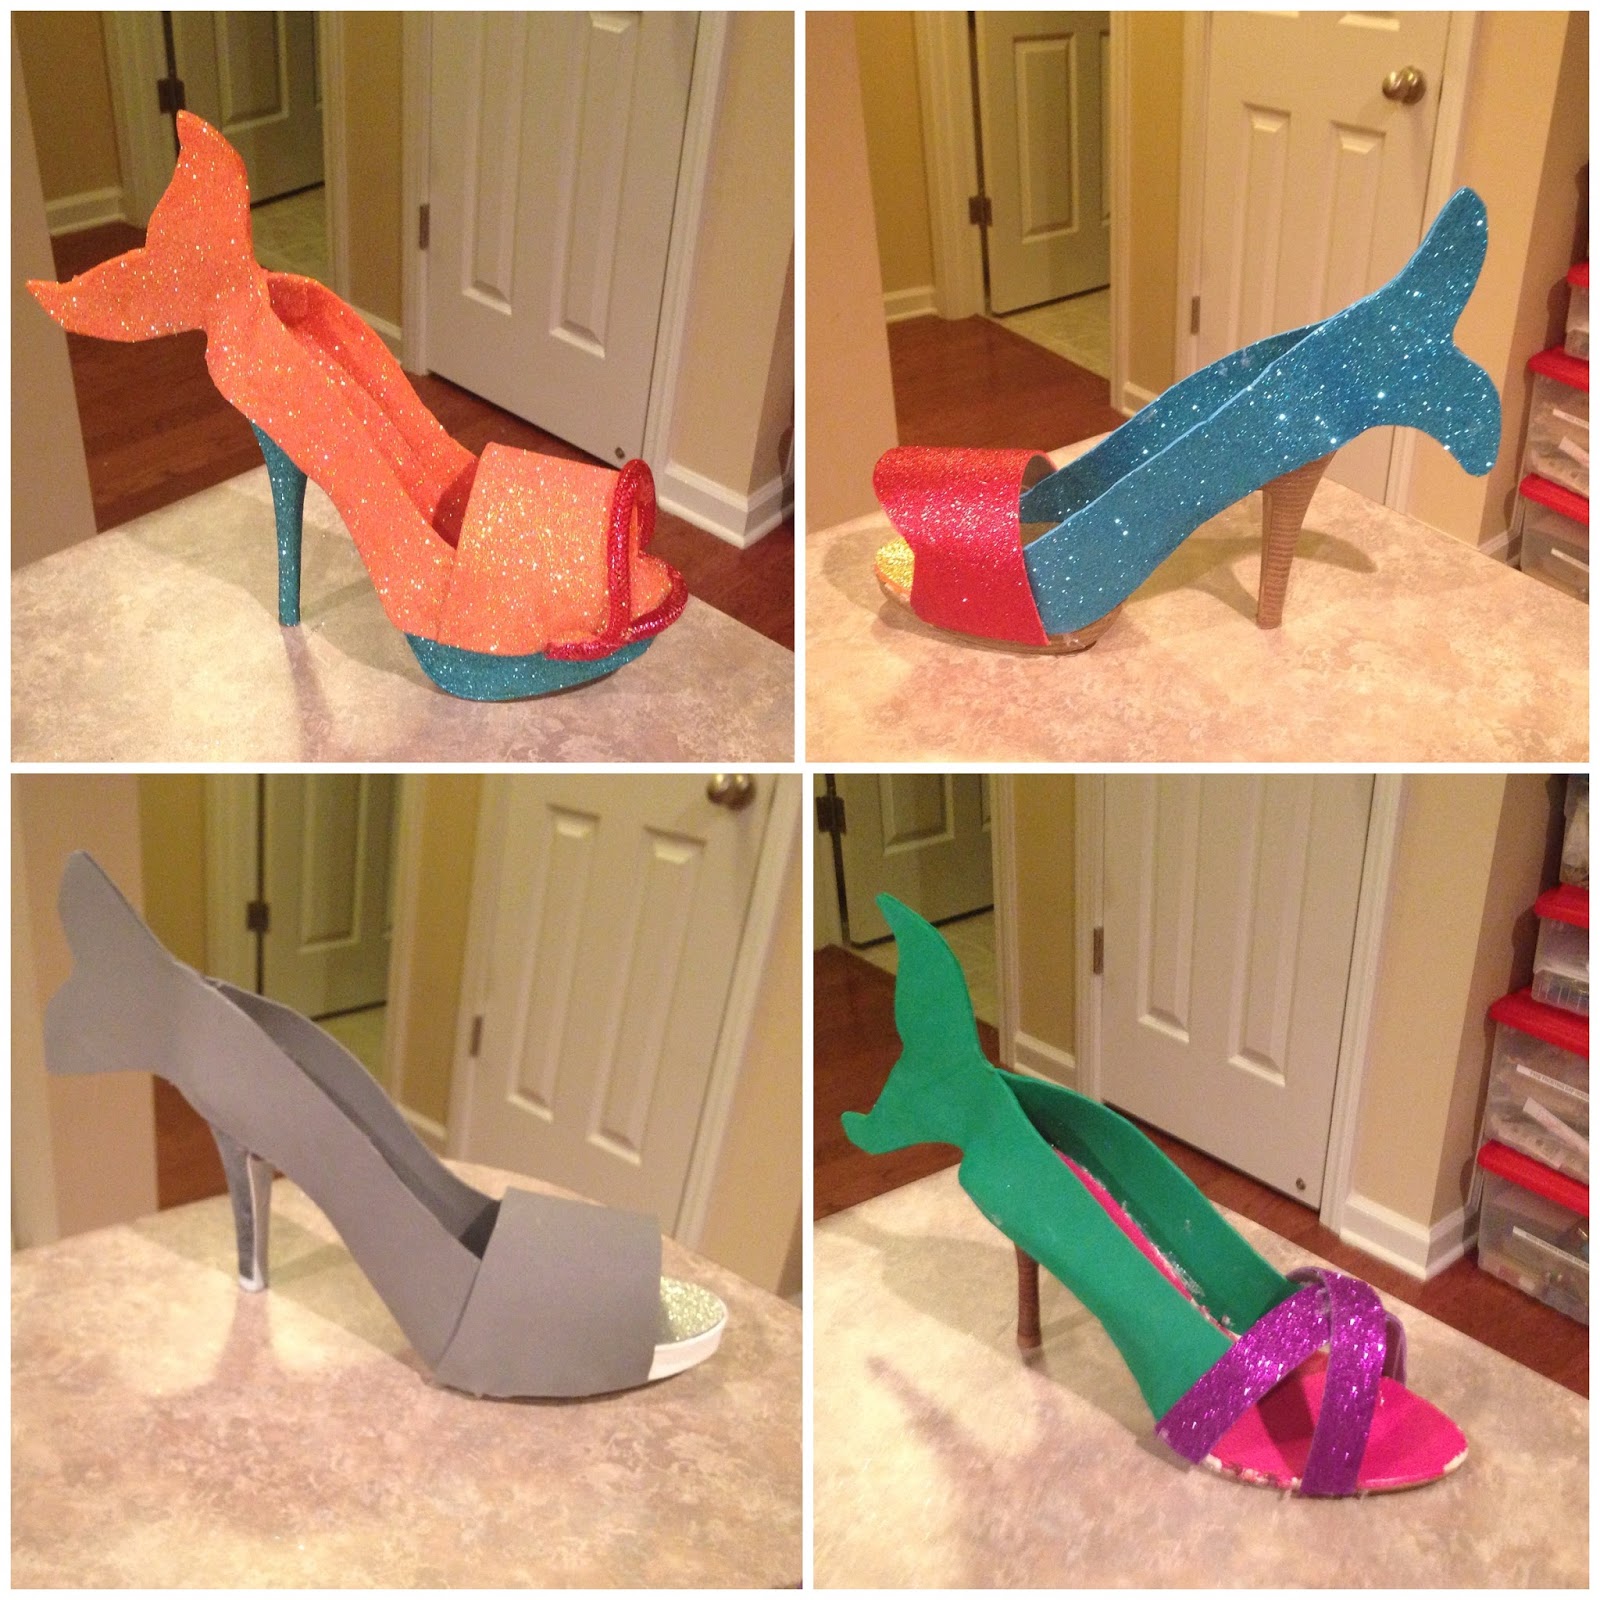
What else? Experimenting with some fish shoes:


Lots more to come on those, including detailed instructions for making them yourself (it's super easy, you just need the right supplies).

Lastly (for now), I made a Jefferson City Buzzards themed shoe as a gift for the Flamingos (who my sister and I ride with as subs) to present them:


More soon - Happy Glittering!

Tuesday, May 3, 2016

Morse Code and my Michael Jackson Muses Shoe (I swear, there's a connection)

In Malcolm Gladwell's book Blink he describes the phenomenon of "fist" in the context of telegraph operators and code-breakers during WWII. I'm no Malcolm Gladwell, but I'll sum up for those who haven't read it: the British women listening in on the German's messages eventually noticed that the way each operator tapped out their dots and dashes was distinctive, like a voice. The unique individualized way of sending a message in Morse code was termed "fist." Eventually, they could tell which operator was sending the coded messages, which gave them information indirectly even if they didn't know what the messages were saying (who was moving where, etc.).

Now, I know I'm pretty obsessed (one might even say *addicted*) when it comes to glittered throws, but more and more I notice that individual glitter artists have their own distinctive styles, their own glue-and-sparkle-covered "fist," if you will. A certain type of trim or color palette, and I immediately have at least a guess whose shoe or purse I'm looking at (though all the marvelous cross-pollination we have going these days makes it a little tougher to trace). There's something to be said for identifying what elements characterize your style, both so you can push outside your comfort zone and, at the other end of the spectrum, so you can embrace your unique take on the throw.

In weak moments I may believe I'm an exception because I'm so super versatile with such eclectic tastes in inspiration that this couldn't possibly be the case for me shoes, but who am I kidding with that? I think my signature style (certainly the shoes of mine that people are most responsive to) is what I tend to term the "structural shoe" which I define as a shoe where something has been built out or replaced, especially the heel/back of the shoe. For example, if the back of the shoe is a popcorn box, or a snoball or a trumpet...that's more likely to be one of my babies (though not always - plenty of other people rock this approach out). I am also most inspired by shoes in this style, like Robert Tabor's Shoe Sculptures and Claudia Lynch's Shoe Stories Prints.

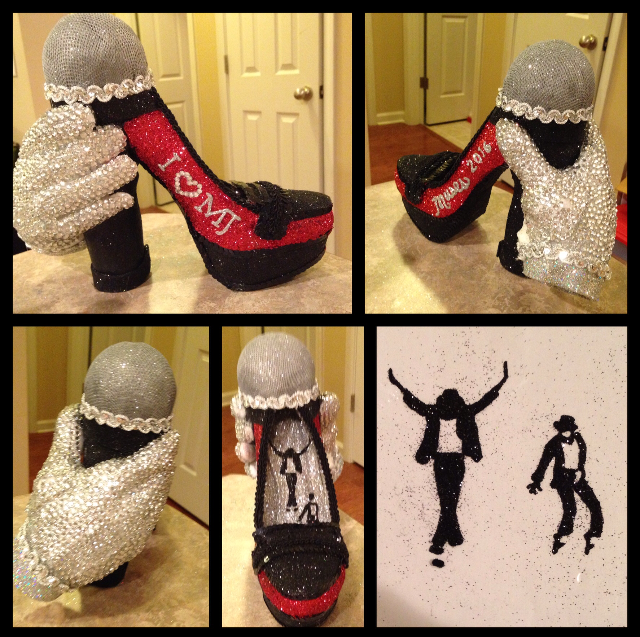
Last year a friend asked if I'd make her a Michael Jackson shoe last year, but Glitter Buzz Nola had recently absolutely crushed it on this fabulous pair of MJ shoes. So I had to really think about it: "What are the unique elements of my shoe style? What can I bring to this concept? What would make it not only an MJ shoe but undeniably one of my shoes?" This was one of the shoes of 2016 that people most gushed over (in person and online), so I feel like that approach paid off in a really satisfying way. I'm also embracing my crazy a little more, so I felt like it was ok to lean into over-the-top construction details - hand placing hundreds of rhinestones is nuts, sure, but the end result was so worth it and that makes me happy.

On to construction details and pics!

Glitter Buzz Nola nailed the color palette, so I didn't deviate much from that: silver, black, red and plenty of clear rhinestones. I used Gary's glitter by the pound for the black and silver, and Martha Stewart "garnet" for the red.

I knew I wanted the rhinestone glove on there, and considered attaching it like it was holding the shoe, very much like what you see here on this weird pair . But no matter how I configured that, it always looked a little creepy, like a disembodied zombie hand reaching out and grabbing onto your shoe. My overactive imagination aside, I needed something to bridge the gap. I decided to go with what I'm best at shoe-wise and put some structural element in place of the heel/back of the shoe. I made the heel into a stylized microphone, then wrapped the glove around that, then bedazzled like a mad women (which I am). Success! I loved the way this looked.

The microphone is a foam ball covered with some netting I spray-painted silver on a cylinder of black craft foam with some silver trim. I stuffed the white glove (my late mother was a costumer, so her stash includes many many pairs of cheap white cotton gloves) with cotton and hot glued it to the microphone, then did several coats of white glitter to stiffen the fabric and add some shimmer between the rhinestone cracks.

Here's the shoe after the microphone and glove were added, before any beddazling. You can also see I used a little black craft foam to add some loafer detail to the shape.
 Once the glove was in place, I started adding the rhinestones one at a time. I used Jewel-It (devoted readers will remember that E6000, though near and dear to my heart, is no beuno for rhinestones and Elmer's wasn't really working out - not thick enough). This was my first foray into serious rhinestone coverage and I learned a lot. I used a wooden dowel and a plain chapstick to dip in glue and transfer rhinestones onto the glove, then buffed off the chapstick from the dried surface. That worked pretty well, but I have since invested in some of these, and they're even better (though I'm hoping Santa brings me a rhinestone katana). I've also started using GemTac instead of Jewel-It, and I might maybe like it a tiny bit better (though both are good).

Rhinestone coverage in process! Please don't judge the mess - it was nuts trying to get shoes done this year

One of the other elements of my style (though just about everyone else who uses this technique does it better than me, including former workshop attendees, which seriously bruises my poor frail ego) are transfers. If you haven't tried transfers yet, check out my write-up here and Glitter Buzz NOLA's excellent blog post here here (including video!!) It's an awesome way to add great detail to your shoes/purses/etc.

I did a couple of black glitter silhouettes of MJ. I tried them on the red, but they popped most over the silver so I stuck them inside the shoe as a little hidden Easter egg type detail.

The one of the far left didn't look as clean once transferred, so I just used the middle and right and made a graffiti lettering red "WHO'S BAD?" transfer to fill the space
After glittering, adding the glove and hand placing hundreds of rhinestones, working out some additional glove embellishment and gluing on transfers (including the silhouettes, an "I <3 MJ" with the heart outlined in rhinestones, and Muses 2016), the shoe was ready to go be loved in it's new home:


Next post I'll share what I'm working on right now for 2017 - pralines, fish shoes, snoballs...

Saturday, April 2, 2016

Inspiration!

Lent is over and I'm officially back to glittering shoes (I may have slipped up a little at the end there...I'm only human). Anyways, time off glittering gave me a chance to organize, restock and plan out my shoes for 2017 and beyond. Since I'm feeling so very motivated, I thought I'd share some of what's inspired me in the past and is inspiring me right now.

I'm often asked how I feel about people "copying" my shoes (not the word I'd chose...I much prefer "homage," especially when I'm the one doing the stealing). And I always say go for it - that's exactly what this is here for! The great thing about Mardi Gras throws is nobody's in it for money: my top priority is everyone making and receiving the best handmade throws. Anything I can do to help with that, I'm all about - techniques, ideas, heck I've even put supplies in the mail when I get email requests for them (rainbow sponges, gummy bears, mini snoballs...) So please "homage"/steal/recycle my ideas with 0% guilt - we're all in this together.

Another reason why I can talk so big and pretend like I'm sooo high-minded and generous is this: if I were to be irritated by other people using my ideas, I would be a huge hypocrite because I am pretty much a footwear Jesse James over here.

First and foremost, I look at other women's throws for creative mojo. No surprises there...it's the Krewe of Muses after all, divine inspiration is kinda their thing. When I started shoe glittering there wasn't as much of an online community, but now there are more and more opportunities to see handmade throws being shared online both by the makers and the lucky recipients.

I do also get ideas from non-Muse-related sources. Even if you don't get any shoe ideas for your own personal stash (or, more likely, aren't even thinking about shoes yet because duh Mardi Gras is still like a year away), there's some really fun/clever/gorgeous eye candy in here to enjoy:

1) Shoe Stories - I bought Shoe Stories Two at the Garden District Book Shop (a signed copy with the inscription "I wish shoe all the best" no less - this artist just gets me). As I flipped through I had a serious "oh my goodness, where has this been all my (shoe glittering) life?" moment. Clever and beautiful and very much up any Muses fangirl's alley - I'm definitely going to be drawing inspiration from here and the dream craft room I keep redecorating in my head now includes some of those prints...

2) Irregular Choice - Some designers are definitely secretly Muses, but are just making wearable versions. Irregular Choice, if you've never checked them out, are definitely in the shoes-as-art/conversation-piece camp. Image search Irregular Choice and enjoy racking up great shoe ideas.
Hard to pick favs when there are so many mind-blowing designs, but their Star Wars Collection and new  Disney Alice in Wonderland Collection are amazing.

3) Botanical Shoes - I bought and have very much enjoyed Shoe Fleur, and have been perusing this artist's work as well: Brown Lee Art Studio. They tend to be a little more abstract/harder to directly copy structural elements from, but for me they make up for it in aesthetics. Since New Orleans is basically a tropical paradise, you can work a lot of thematic botanical stuff into your shoes. The artichoke shoe in Shoe Fleur inspired my artichoke shoe long before I even owned the book.

4) Robert Tabor - You may not know him by name, but if you're in the crazy-shoe-game, I bet you recognize at least a few Robert Tabor Shoe Sculptures. His brilliant sandwich flip-flop gave me the idea for the shrimp poboy flip flop, his auto-mo-heels series deserves some of the credit for getting me to try wheels on shoes... there are too many other credits to possibly identify. Also be sure to check out his etsy shop (Sole Sensations) and please join me in coveting that spectacular high heel chandeleir he made.

All for now - happy glittering!!

Thursday, February 18, 2016

Tiffany Blue Glitter Shoes - Updated for 2016!

Giving up glittering for lent will *fingers crossed* hopefully mean catching up on blogging. So here goes!

In 2014, I did a Tiffany Box Shoe and shared my thoughts/research/insanity on how best to match that iconic shade (at the time, I went with Recollections "frost" blended with Martha Stewart "wintermint") and a recent chat with a fellow shoe-glitter-enthusiast reminded me I've been meaning to write an updated post!

Tiffany Box is a fairly common theme for Muses shoe glitterers - like ruby slippers and Cinderella shoes, it's just one of those themes we all love to put our own unique spin on (full disclosure: I was not the first). Tiffany blue and black are also the official krewe colors of the newest arrival on the Carnival scene, the Krewe of Pandora (their signature throw is a hand decorated glittered box). So maybe some Pandora ladies will find their way here and find this info useful! Maybe you have no idea what I'm talking about with all this "krewe" and "signature throw" talk, but want to DIY some Tiffany blue shoes for your wedding day - I got your back.

My glitter collection has grown a lot since 2014, including a new shade introduced by Martha Stewart called "crystal mint," which is pretty damned near perfectly matched to Tiffany blue (probably not a coincidence based on the sheer volume of Tiffany blue that appears in wedding boards on Pinterest). So while I stand by my blending on Tiffany Box Shoe version 1.0, it was time to revisit the concept. I pulled some "top contenders" for the closest mix-free match to Tiffany blue (including the two I'd mixed previously and a Tiffany & Co. bag for comparison) and put it up to a vote over on my Instagram account:

#1 is Martha Stewart "wintermint," #2 is Recollections "frost," #3 is Martha Stewart "crystal mint" and #4 is ultra fine glitter from Joann's in "Caribbean blue"

Popular opinion (and I happen to agree) was that #3 was the closest match to Tiffany blue. So there you have it - just make sure (as always with an iridescent sheer glitter) you're layering over a similar pale blue or white so the underlying shoe color doesn't bleed through (I would prime with white spray paint first, personally or start with a white shoe or purse). I should also note that Martha Stewart "crystal mint" is what GlitterBuzzNola used for her Tiffany shoe, and you can see for yourself how lovely it turned out. I buy Martha Stewart glitter at Michael's (usually using a 40% off coupon), you can buy it online here. Note that there isn't any "crystal mint" in the 12-pack, so you're looking at getting one of the 1.5 oz bottles (which is about the right amount for covering one average sized shoe).

I can't just leave it at that though, as Martha Stewart iridescent glitter is on the higher end of the price per ounce scale. Martha Stewart iridescent glitter is $5.99 for a 1.5 ounce bottle at Michael's, so $4/ounce if you're buying full price, a somewhat more reasonable $2.40/ounce if you use a 40% off coupon.

The #4 option shown, Extra Fine Glitter from Joann's is a bit cheaper: $4.49 for 2 ounces, so $2.25/ounce regular price and $1.35/ounce with a 40% off coupon (though honestly I tend to use my coupons at Joann's on trim, as I think that gives me more bang for my buck, so I'd probably be getting this on a 20% off entire purchase coupon day instead)

If all that math isn't really your thing and you just want to make a decision based on color/prettiness, here are some pictures to help with that:


Tiffnay bag for comparison plus glitter samples (essentially what I posted on IG but no filter)

Samples of (left to right) MS "wintermint," Recollections "frost," MS "crystal mint" and Joann's fine glitter "Caribbean blue" with flash
Tiffany bag on the far left for comparison, and full bottles of glitter with samples of each. The big jar on the far right and the sample below the others is Gary's glitter by the pound which wasn't in the original voting block.
Same, but with flash

So, what I'm doing on my Tiffany Box 2.0 (I'm doing some riffs on the box wedge approach I did for my Chocolate Box shoe, including a Tiffany box filled with jewels), is two coats of the cheaper Joann's and a third exterior coat of "crystal mint" so I can use the pricier stuff in moderation and save it for another shoe (maybe another Tiffany shoe or two or three, who knows?) I'm planning a Disney themed challenge for myself this year, and I imagine it'll come in handy there.

Here's my Tiffany Box after the first two coats of Joann's "Caribbean blue," I will update when the shoe is finished:


I also must add that Gary's makes a powdery blue that I straight up fell in love with this year. Gary's is one of the best prices around ($8.50 per pound the last time I was in there) and who doesn't love to buy local? It's just a hair too pale to be a 100% perfect match for Tiffany blue, but it's pretty close and so so much cheaper than Martha Stewart. When I posted this shoe I was fiddling with over on Instagram, I actually got comments that it looked I was doing a Tiffany shoe!


So, I would definitely recommend a trip to Gary's, especially if you had a ton of boxes to glitter...at the very least you could give yourself a break by doing 1-2 coats of that, then following up with a coat of one of the pricier glitters if your heart was really set on one of them.

Ribbon-wise, I used an actual Tiffany box ribbon on the first shoe, but for this one I'm using papermart.com double-faced white satin ribbon. I buy a ton of stuff from papermart.com (including the plastic gift bags I use for my shoes and sequin trim), and I've liked everything I've bought from them. And no I don't get anything for saying that (don't I wish!) Their double faced real satin ribbon is luxury on a spool. Sidebar: they also sell glitter by the pound and in little 1 ounce bottles...it's a little less fine/chunkier than Martha Stewart, Recolllections or Gary's, but still workable (what it lacks in fineness it makes up for in brightness). Explore the site a little, and if you're ordering anything get yourself a few of the 1 ounce tubes to check out/play with if you're curious and get a spool or two of sequin trim from them (you have to pay for shipping, but the cheapness of the sequin trim is worth it).

Sooooo that's everything I've got on Tiffany Box glittering...anyone got any other tips? Leave 'em in the comments pretty please!